Using the API
1. Open the API page
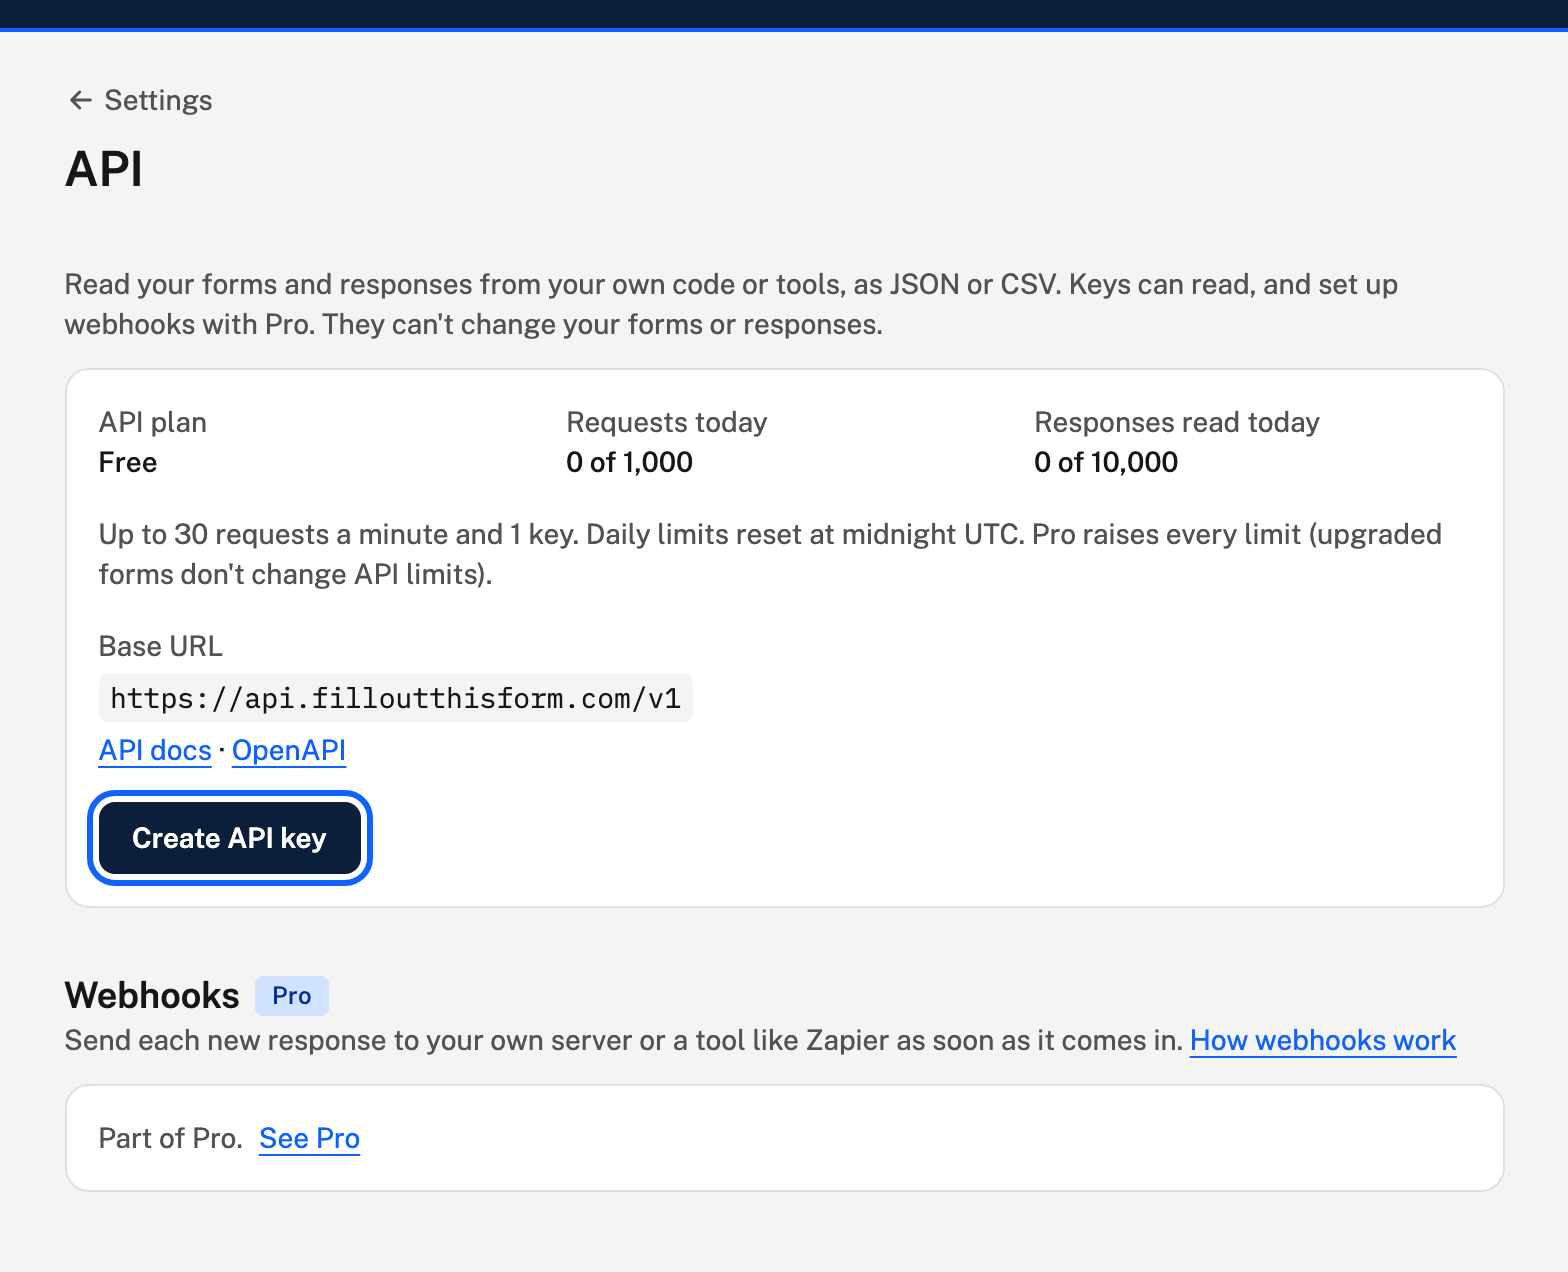
Choose your initials at the top right, then API. It shows your API plan, what you've used today, and the base URL every request starts with.
2. Create a key
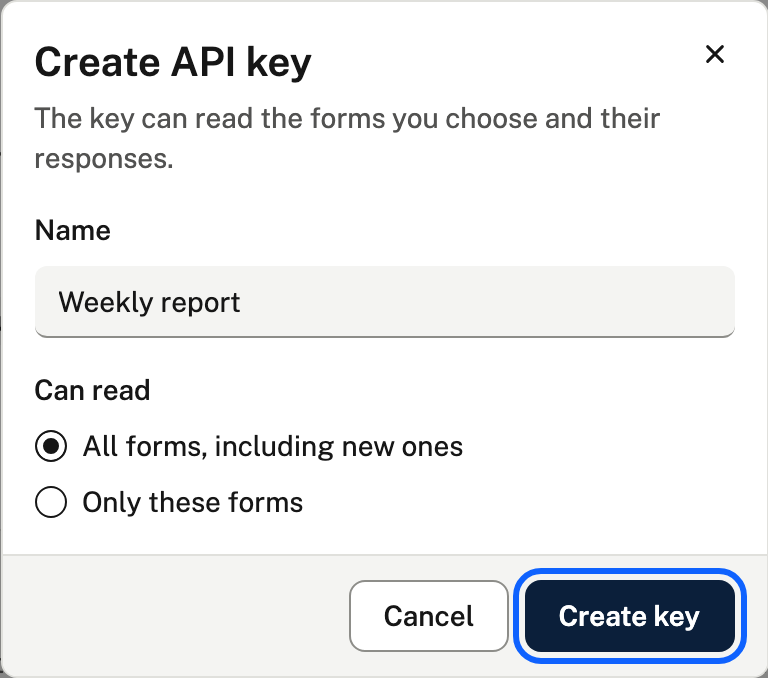
Choose Create API key, give it a name you'll recognise (what will use it, such as "Weekly report"), and choose what it can read: all your forms, or only some.
3. Copy it somewhere safe
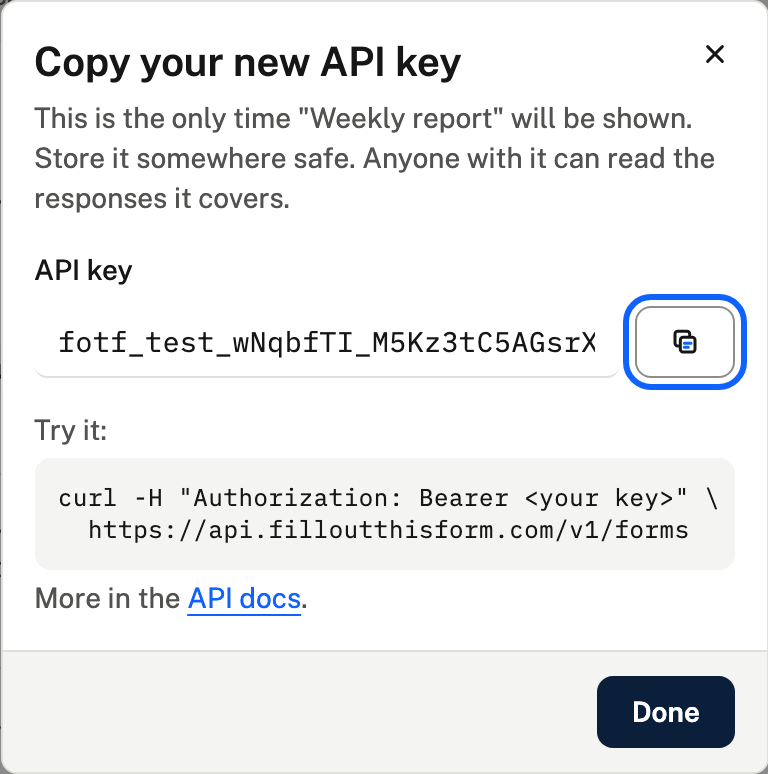
The key is shown once, so copy it now and keep it in a password manager or your tool's settings. We only keep a scrambled copy, so it can't be shown again. If you lose it, revoke it and make another.
4. Make your first request
Send the key in an Authorization header and ask for your forms:
curl -H "Authorization: Bearer YOUR_KEY" \
  https://api.filloutthisform.com/v1/forms
You get your forms back as JSON:
{
  "data": [
    {
      "id": "3582111c-9a64-43b5-bd57-e6d0cabeaa80",
      "name": "Garden survey",
      "color": "blue",
      "link_count": 1,
      "response_count": 0,
      "created_at": "2026-10-16T08:52:10.000Z",
      "updated_at": "2026-10-16T08:52:13.269Z"
    }
  ]
}
5. Get to the responses
Follow the ids down. A form's shared links:
curl -H "Authorization: Bearer YOUR_KEY" \
  https://api.filloutthisform.com/v1/forms/FORM_ID/links
Then one link's responses, oldest first:
curl -H "Authorization: Bearer YOUR_KEY" \
  https://api.filloutthisform.com/v1/links/LINK_ID/responses
Add ?format=csv to the responses address to get a spreadsheet file instead of JSON. Long lists come a page at a time. The API reference explains paging, syncing only new responses, and every endpoint.
6. Keep track of your keys
Back on the API page, each key shows what it can read, when it was made and last used, and how many requests it's made and responses it's read, today and over the last 30 days. Your plan's limits are for all your keys together. Choose Revoke to stop a key working at once.

Limits
- On Free: 1 key, 30 requests a minute and 1,000 a day. Daily limits start again at midnight UTC.
- Pro raises them. See Higher API limits.
- The API reads your forms and responses. It can't change or delete them.